My 5 year old son has been begging me to paint his bedroom walls, apparently he is tired of the boring beige color. He wants a Star Wars room! I’m not sure why he’s such a big Star Wars fan, but he is…that and Lego’s. We are working on making an awesome bedroom for him. While gathering some inspiration on Pinterest, I really liked the room colors and stars at the top of the walls from this room. I also thought it would be fun to have a focal wall that looks like it’s in hyperspace. So I painted one wall, ceiling and 1 foot down on the other three walls dark blue, the rest of the walls sky blue.
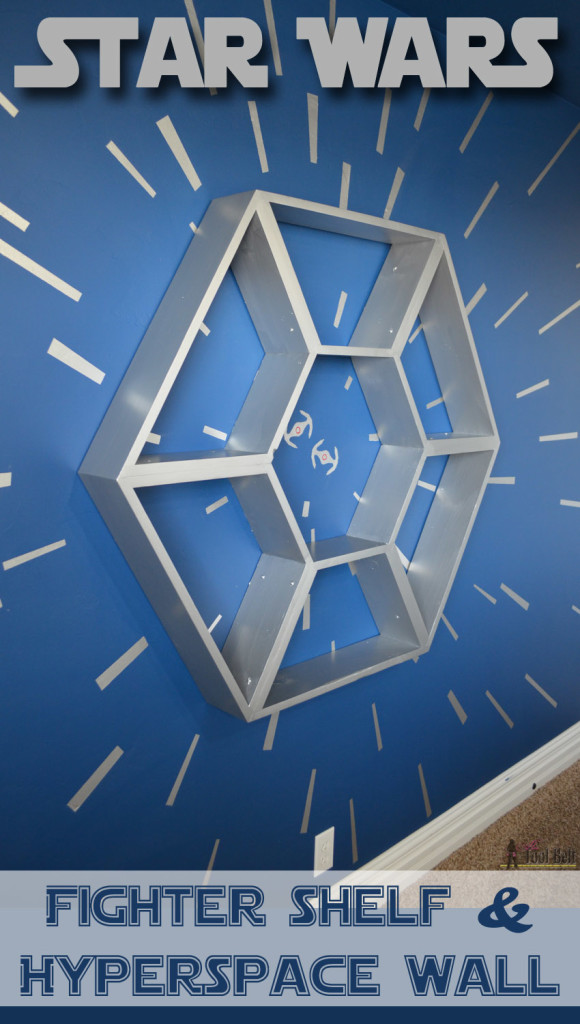
Everyone knows that you can’t go through hyperspace without being in a fighter ship, right! I designed a large Star Wars Fighter Shelf to be the center of the hyperspace wall. The Star Wars fighter ‘window’ should be round, but that’s too much of a pain…I opted for a hexagon with nice straight edges.
How to Build a Star Wars Shelf
Materials
- 5 – 1″ x 6″ x 8′ pine boards (actual 3/4″ x 5 1/2″)
- 1 1/4″ pocket holes screws (affiliate link)
- wood glue
- wood filler
- sand paper
- paint primer
- Modern Masters Silver Metallic Paint (ME150)*
- Modern Masters Sashay Red Metallic Paint (ME513)*
*I have heard lots of great things about the Modern Masters paint. I was able to do a review of a quart of metallic paint…perfect for this project. Modern Masters will sponsor a giveaway, wahoo!
Step 1
Cut 6 pieces of 1 x 6 that are 24″ long and have a 30 deg bevel on each end.


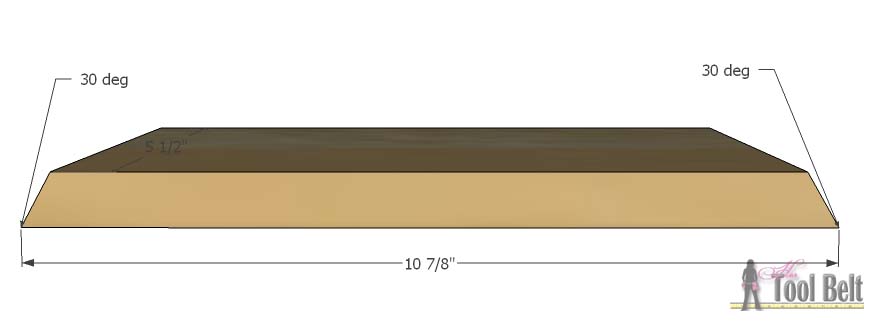
Cut 6 pieces of 1 x 6 that are 10 7/8″ long and have a 30 deg bevel on each end.
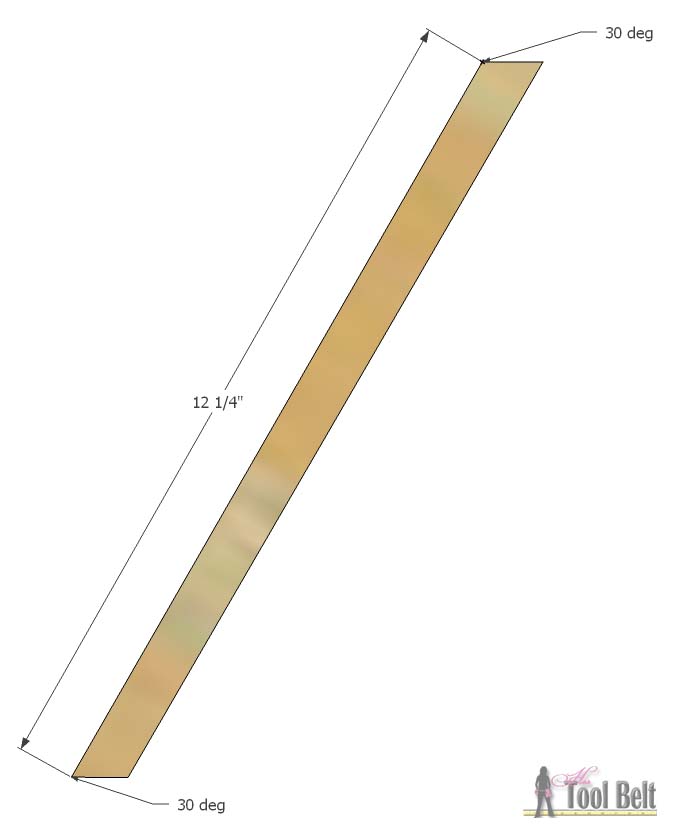
Cut 12 pieces of 1 x 6 that are 12 1/4″ long and have a 30 deg bevel on each end, except the bevel needs to be facing the same direction this time.
Step 2
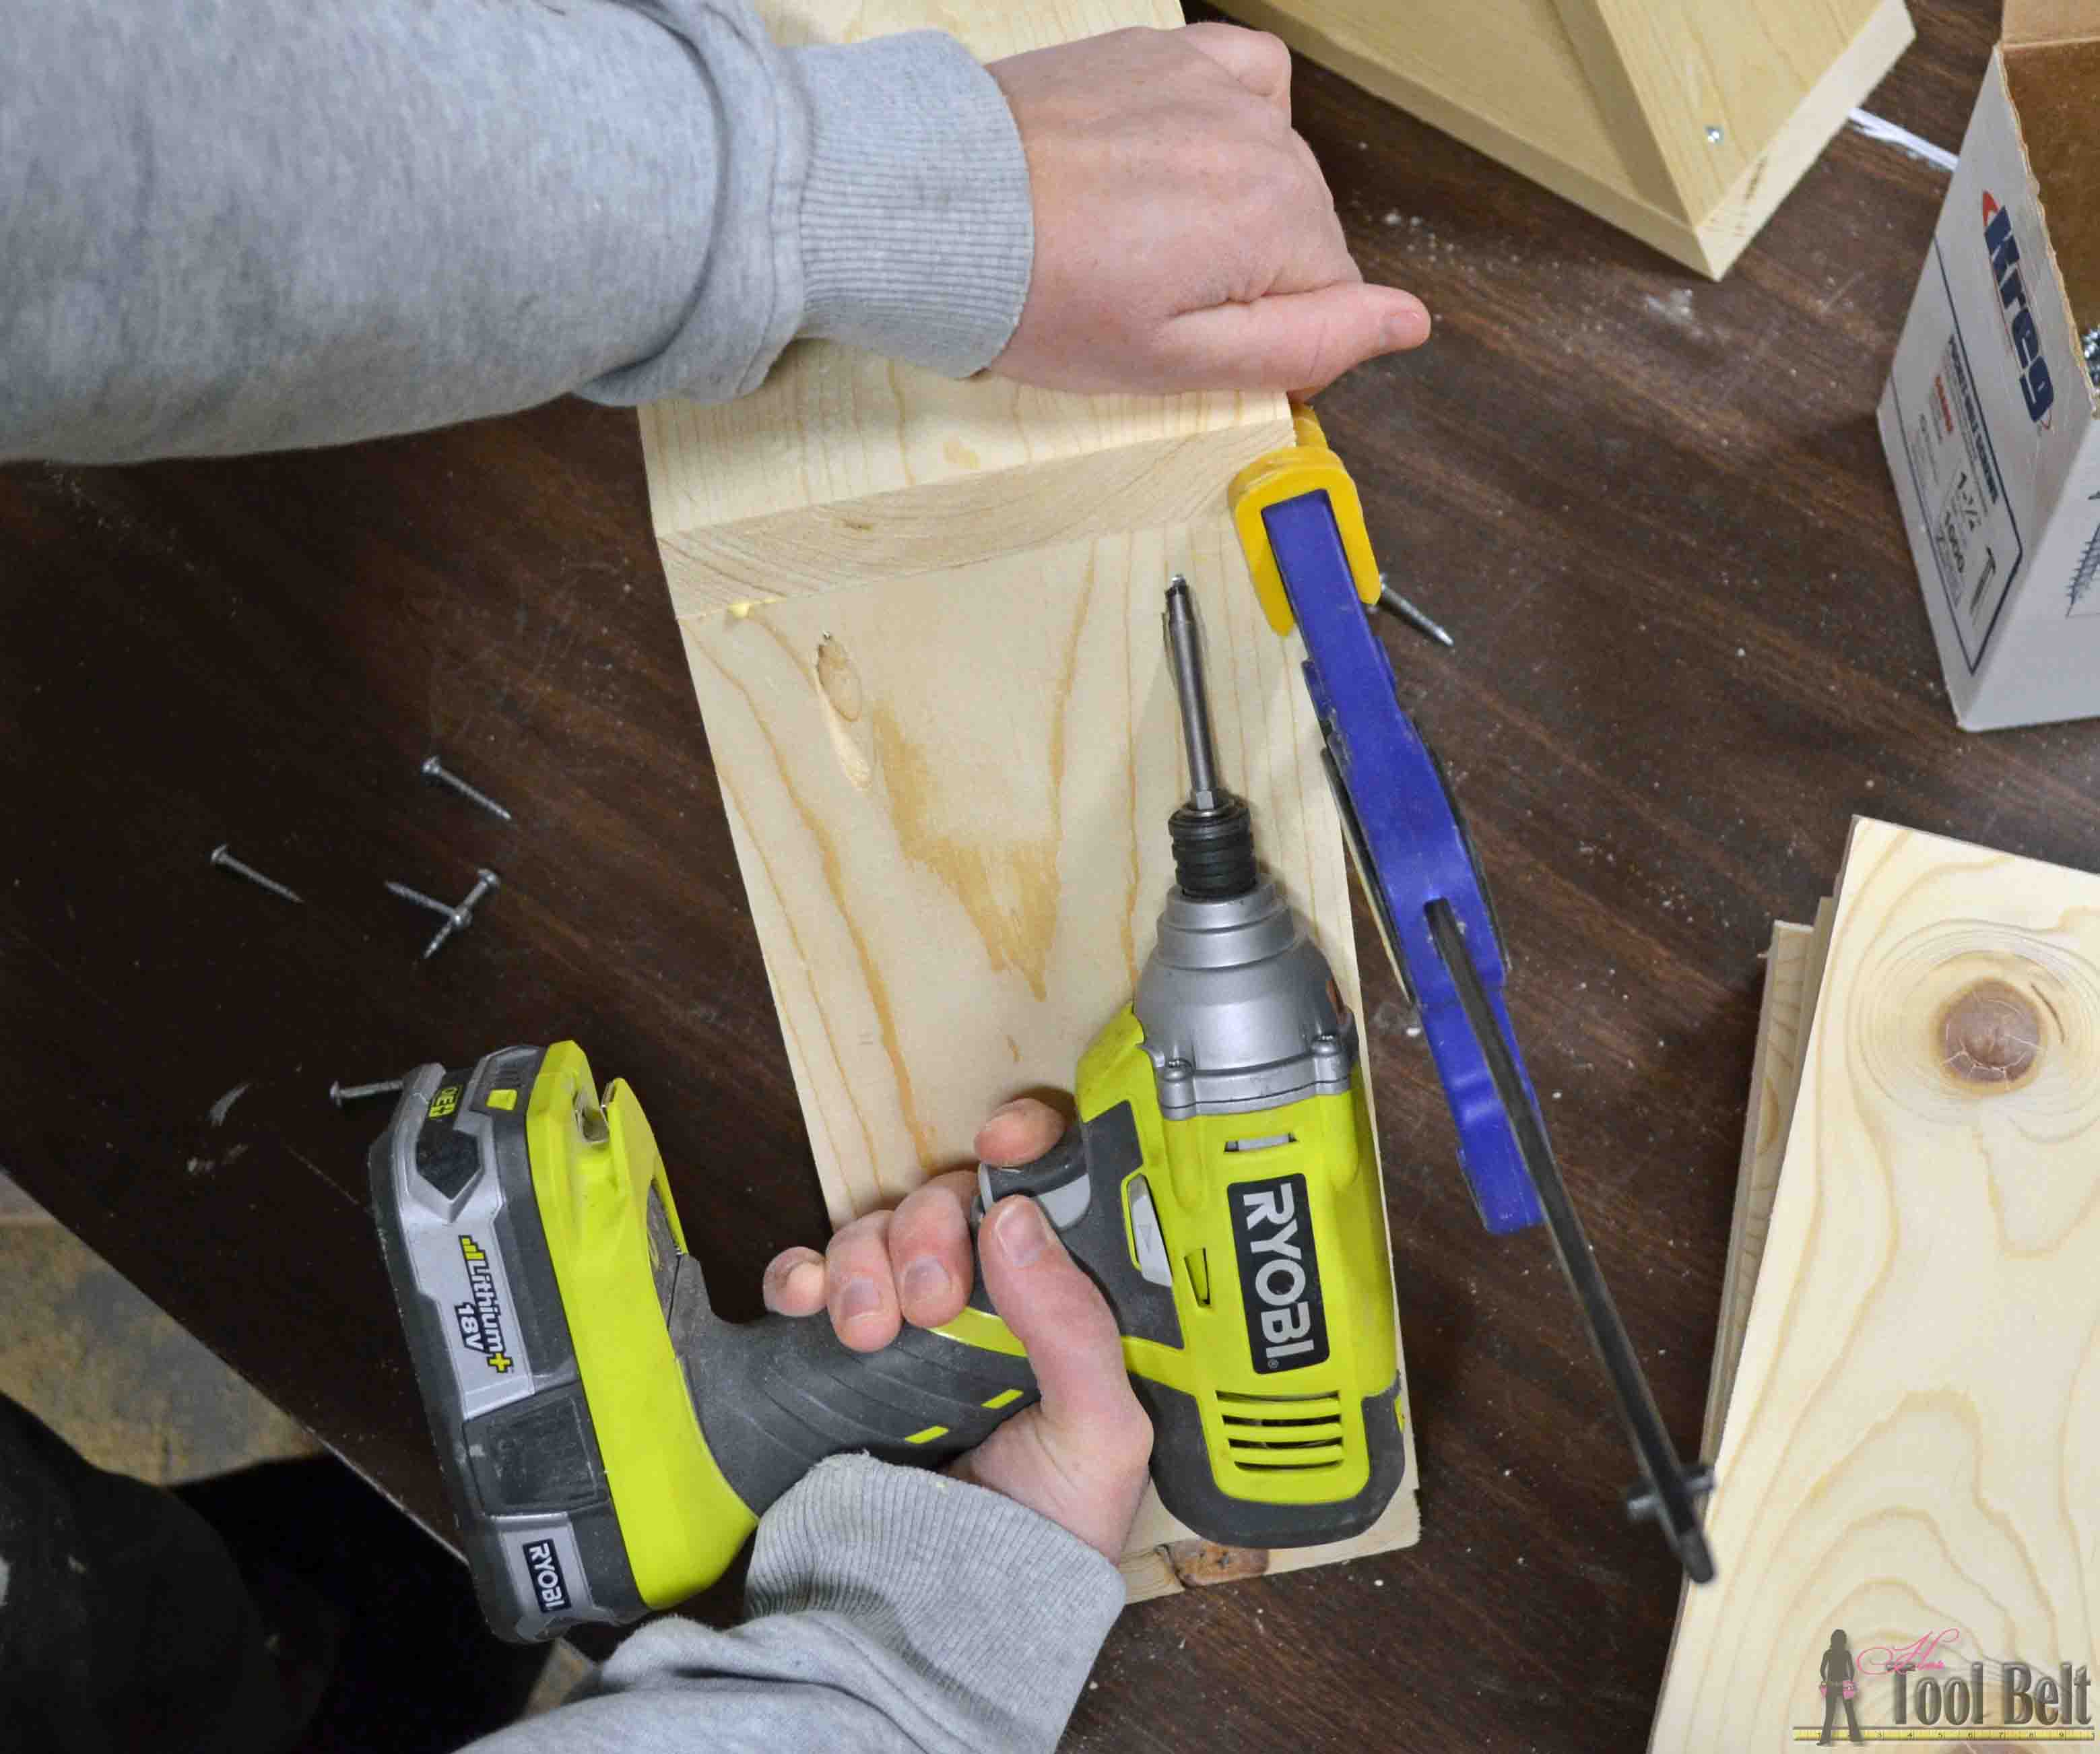
On one face of the 12 1/4″ pieces, drill 2 pocket holes (affiliate) on each end. Since this is an odd joint, to make sure you are getting enough thread engagement, screw in a 1 1/4″ pocket hole screw and see how much thread is showing, aim for about 5/8″ – move your collar fwd or back and re-drill to get the right depth.
Needs to be drilled deeper.
 Adjust collar depth.
 Just right.

Step 3
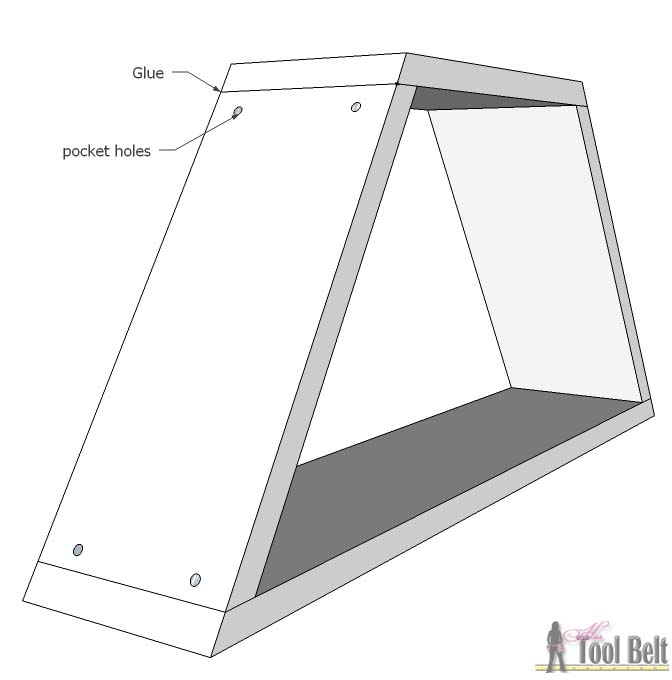
Now we’ll make 6 trapezoids, the pocket holes are going to be on the outside of each trapezoid. Add a bead of wood glue on the ends of the 12 1/4″ pieces and join to the 24″ and 10 7/8″ pieces.
![An awesome Star Wars bedroom with a hyperspace focal wall and fighter cockpit Star Wars Shelf. The boys are going to love this!!!]() Step 4
Step 4
To assemble the hexagon, I glued the side faces of the trapezoids and used 1 1/4″ screws to secure them together.
 I left the screw heads showing to make it look more industrial. Then I filled any cracks and gaps with wood filler, let it dry.

Step 5
Sand the hexagon smooth and remove the dust. I primed the wood with Zinsser Bullseye, and let it dry.

Then I painted it with the Modern Masters Silver Metallic paint, I have to tell you that I am really impressed. The paint went on very smooth and the coverage was awesome. I applied two coats of paint, even though I probably only needed one. In real life, it looks like shiny metal.
![An awesome Star Wars bedroom with a hyperspace focal wall and fighter cockpit Star Wars Shelf. The boys are going to love this!!!]() Step 6
Step 6

Find the studs in the wall to hang the shelf. I like to mark mine with painters tape. Then level and mark where the screws should go. I drilled 2 1/2″ screws into the studs to hang the shelf.

Take the corresponding screw distances and put hangers on the shelf, or route keyholes in the shelf to hang it.

Next step is the hyperspace wall! I taped random stripes on the wall that radiated out from the shelf and gradually got longer. I really struggle with random, and since the stars should be random, I printed a picture of hyperspace for a guide.


In the center I traced a couple of tie fighters, as if we are chasing them  Again the silver paint went on great and only required one coat.

The finished hyperspace wall.

To finish off painting around the room, I painted a 3″ silver stripe between the dark blue and sky blue. Then I printed off some Star Wars dingbats and traced them on the wall, then filled in the tracing with silver paint. Added some red accents with Sashay red. Finally I painted stars on the wall, don’t look to close because I hand painted them and I’m not an artist 

My son is thrilled about the room so far. After all of that silver painting, I only used 1/3 of the quart. Sweet now I have some for future projects. We are planning on a R2D2 side table, rustic shelves, glow in the dark stars on the ceiling and a few Star Wars type art pieces.

Pin it:
Download How to Build a Star Wars Shelf Plan
Star Wars Shelf plans-hertoolbelt
Linked to my Favorite Link Parties, Remodelaholic, Savvy Southern Style
The post Star Wars Shelf and Hyperspace Wall appeared first on Her Tool Belt.


